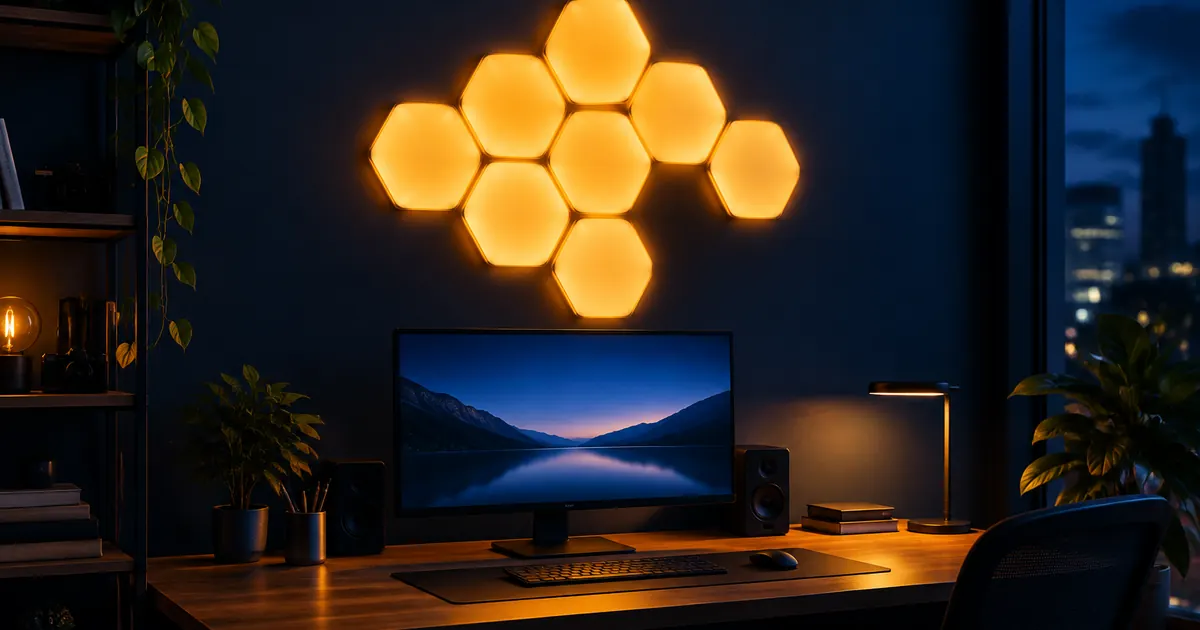
Hexagon smart light panels are the most dramatic product in smart lighting — a modular wall of glowing tiles that responds to touch, music, and app scenes. Done well, they're the feature everyone asks about. Done carelessly, they're a grid of triangles above your desk that looks like a science fair project.
The difference is planning. Here's how to design a panel wall that looks intentional, using our 16-panel hexagon kit as the example.
Step 1: Pick the Right Wall
The best panel walls share three traits:
- Visible from where you sit: the wall you face (behind a desk or TV) beats the wall behind you
- Contrast: panels pop against darker paint colors; on white walls they read as faint pastel shapes
- Power access: every kit needs one outlet; plan the run before you stick anything
Gaming setups, home offices, media walls, and bedrooms are the classic placements. Kitchens and hallways work too, but the panels earn their keep where you spend evening hours.
Step 2: Design the Layout Before Sticking Anything
Resist the urge to fill the whole wall. The strongest designs use negative space — a diagonal slash of hexagons across a corner, a honeycomb cluster that thins toward the edges, or a deliberate "wave" that follows your furniture line.
Three layouts that work
- The diagonal cut: a band of 8–12 panels running corner to corner. Dynamic, modern, and works in almost any room.
- The honeycomb cluster: a dense hexagon of hexagons (19 panels forms a perfect larger hexagon) centered on the wall. Symmetric and satisfying.
- The scatter: 6–10 panels in loose pairs and singles. Hardest to pull off — keep at least 4 inches between groups.
Most kits include a paper template for planning. Use it. Measure twice, stick once — the adhesive is strong.
Step 3: Program Scenes, Not Colors
The app's scene system is where panels separate themselves from plain LED strips. Build scenes for how you actually use the room:
- Focus: cool white at 60% brightness — panels as task lighting, not decoration
- Movie: dim warm amber, or a slow "fireplace" animation behind the TV
- Music: rhythm mode makes panels react to sound; great for parties, exhausting for work
- Wind-down: deep amber at 10% as a last-hour-of-the-day cue that it's time to sleep
Voice control ties it together: "Alexa, movie time" should set the whole room, panels included.
Step 4: Mind the Practical Details
- Wi-Fi range: panels on an exterior wall far from your router can drop. If pairing fails, move closer during setup.
- 2.4GHz only: like most smart devices, panels connect to the 2.4GHz band.
- Expansion: panels link edge-to-edge; most kits expand to 30+ tiles. Design your layout with room to grow.
- Cleaning: microfiber cloth, light touch. The matte diffuser shows fingerprints under bright scenes.
Are Panels Worth It vs. Light Strips?
Strips (like our 16.4ft smart strip) cost less and disappear behind furniture — great for bias lighting. Panels are a design statement: they're meant to be seen, they're touch-reactive, and they hold their shape as art. Many rooms deserve both: panels on the feature wall, a strip behind the monitor or TV.
Mounting: Do It Right the First Time
Panel adhesive is engineered to hold for years — which also means it won't forgive a crooked first placement. Three habits from installs we've done ourselves:
- Level the first panel with an actual level. Every subsequent panel keys off the first; a two-degree error compounds into a visibly tilted wall.
- Plan around outlets and switches. Hold the template up and mark electrical boxes before committing.
- Paint first, mount second. Fresh panels and fresh paint don't mix — give walls a full week to cure.
Renters: panels come down with a hairdryer and fishing line, but expect to sacrifice the adhesive strips. Buy once, mount once.
Using Panels as Functional Light, Not Just Decor
The secret most panel guides miss: hexagon panels are legitimate light sources. A 16-panel wall at full brightness puts out enough ambient light to read by — which means they can replace, not just accompany, room lighting.
Design your scenes around this. A home office wall can run cool-white "daylight" through morning hours, shift to a neutral mid-tone after lunch, and drop to warm amber in the evening — a circadian rhythm built from wall art. That's a genuinely different proposition from RGB strips, which decorate but rarely illuminate.
Combining panels with the rest of the room
Panels pair best with lighting that fills what they can't: a dimmable smart bulb in a floor lamp for reading, or a LED strip behind a desk for bias glow. Keep the panels as the hero; everything else supports.
Troubleshooting the Common Issues
- Panel won't pair: 2.4GHz network check first, then distance — bring the panel closer to the router for first-time setup
- One panel dark: reseat its edge connectors; 90% of "dead" panels are a loose link
- Colors look washed out: reduce scene brightness slightly — panels look richer at 80% than 100%
- Touch response inconsistent: clean the surface; skin oils dull the capacitive sensing
Set up with care, a panel wall is a five-year fixture — the kind of upgrade that makes a home office feel like a studio and a media room feel like a cinema.
Start With One Wall
A 16-panel kit covers roughly 4 square feet of glowing surface — enough for a real statement without overwhelming the room. Design the layout on paper, pick your three scenes, and build the wall in an afternoon. Browse the full smart lighting collection to pair your panels with bulbs and strips that share the same app.